For Today:
- 2 static poster designs (digital rendering w/ one concept using an analog technique) / storyboard (3 frames) / 2s motion test
- p4 static poster critique
- Optional Video Demo: Animated GIFs / optional: from AE to PS (watch below)
- Demo File .mp4
P4: Motion Poster
due Thursday 12.11 @9AM
P4 Motion Poster Critique
Please provide feedback on 6 peers on the following points. Post work here: P4_Mosters_F25.
Focus for Critique:

CONCEPT/MOOD: What is the overarching idea (thinking, logic, thread) for your design? How does the poster feel?

CONTENT/MESSAGE: Is the topic clear? Does the content hook us? Does the poster's content unfold in a purposeful way?

TIMING: Look at speed and feel for "sticky spots." Does everything flow? Do any areas feel too slow/fast?

TRANSITIONS: Does any content enter/exit at the wrong time? Are there any transitions that seem out of place or lacking? Looping considerations.

FORMAL CHOICES: Then…how are your design choices communicating the above? Type, color, imagery, etc. Is the event content read clearly, quickly, and easily? Is there unity throughout? Color coding? How did the designer use repetition with variation through the sequence?
P4 Final Submission Guidelines
- Project 4 Final: Final motion design uploaded to Vimeo. Upload your final files in a ZIPPED folder named “lastname_p4_MotionPoster” to the assignments folder on D2L “Project 4”.
- FINAL .aep file
- FINAL movie rendering @1080p or 720p (do not need process renderings)
.giffile- Design Board (P4 file for download) PDF – only 4 frames (the zipped file is revised for the different format and duration) Create Design Boards (P4 file for download)
- All process work (PDFs, JPEGs, PNGs) needs to be on Medium post (not in zipped folder)
- keyword/idea list/mood boards
- brainstorming/sketches
- 1–2 roughs
- 1 static poster
- motion test
Final Presentations: For our final project, you will be presenting your concept for your final work. For your rationale, describe concept (narrative, mood, contrast, and formal) and formal choices. Remember to include both the name of your typeface(s) and WHY they were selected to support your concept. All of your choices should support how you want your work to feel.
Project 4 Rubric
*Keep in mind that project 4 is now worth 50 points (weighted grade in D2L), although the rubric is still based on the value of 100. Keep in mind, that the points will cut in half for everything below. For example: The animated GIF will be worth 2.5pts, as opposed to 5pts.
How to Render your GIF
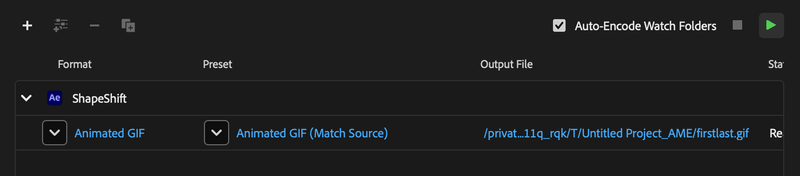
1. Go to Composition > Add to Adobe Media Encoder Queue.
2. In Media Encoder, set Format to Animated GIF.
3. Click the Output File name to choose where to save it (select your desktop).
4. Click the green play button to render.
5. Test your GIF—congrats, you’ve made your gif! (hit spacebar to play)
6. AME (Adobe Media Encoder) makes it easier than ever, but If you’d aslo like to know how to create a GIF in Photoshop, watch the video below.
GIF Tips
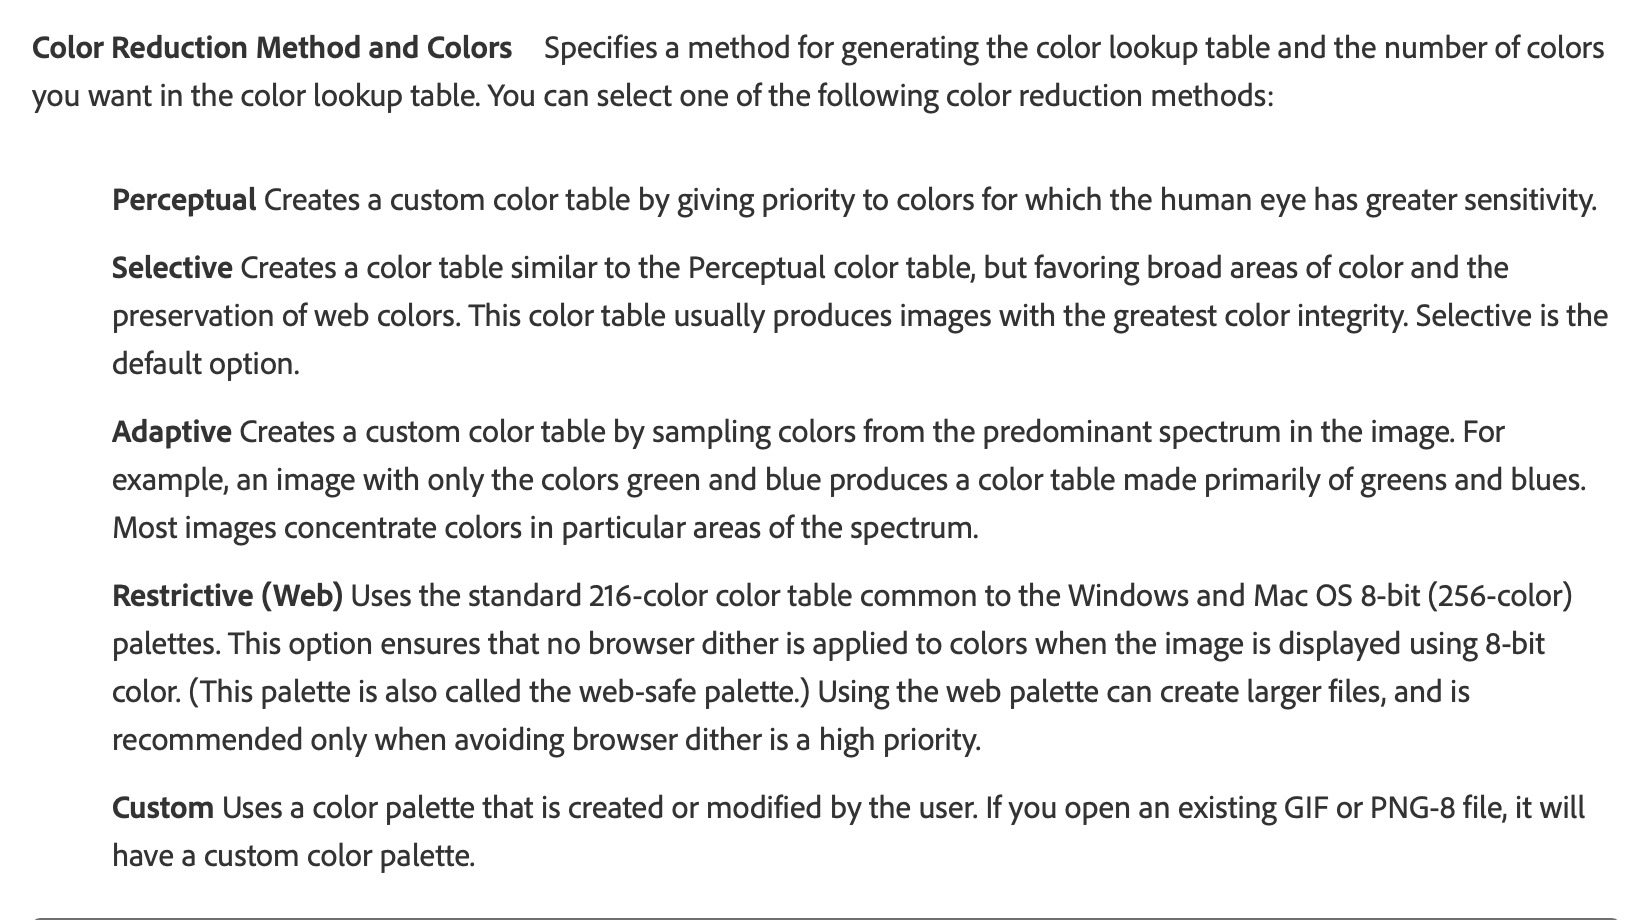
- Color Palette Limitation: GIFs support a maximum of 256 colors. Simplify your design to work well within this limitation, focusing on essential elements and avoiding unnecessary color complexity.
- Reduce Colors Strategically: Minimize the number of colors in your design to keep the file size smaller without sacrificing visual quality.
- Mimimize Gradients: Gradients can create banding issues in GIFs due to the limited color palette. Use solid colors or subtle gradients.
- Plan for the Seamless Loop: Ensure the last frame of your animation transitions naturally back to the first frame for a smooth, infinite loop. This often requires working backward from the end frame.
- Frame Rate Reduction: Lower the frame rate (e.g., 12-15 fps) to reduce file size. However, avoid going too low, as this may result in choppy animation.
- Timing and Flow: Adjust the timing of animations to ensure that looping does not appear abrupt. The transition should feel natural and continuous.
- Dithering Options: If your GIF suffers from noticeable banding, try enabling dithering when exporting. Dithering smooths color transitions but may slightly increase file size.
- Online Optimization Tools: Use online tools like Ezgif.com or TinyPNG for further optimization after exporting from After Effects.
- Use Adobe Media Encoder: After Effects also lets you export GIFs directly. Use Adobe Media Encoder for better control over output settings.
- Tap the spacebar: Preview your GIF to check the loop and ensure smooth playback. On Macs, tap the spacebar in Finder to quickly preview your GIF. On PCs, open in a web browser to preview.
- Creative inspiration: Browse websites like Dribbble or Behance for examples of effective looping GIFs to spark ideas.
Optional Video: AE to GIF in Photoshop Demo Video 18:34

GIF Resources:
Due Next Thursday:
- Final P4 Submission (review guidelines above)
Project 4 Schedule
- 12.4 – Final Crit – Motion Poster + Animated GIFs
____________F I N A L S_________________
- 12.11 – (9AM) P4 Deadline; Final Presentations
Final P4 Submission (review guidelines above)