9.23 | history + p1 studio

For Today: Lecture: History of Motion Design; P1 Studio

5-history-of-motion-graphics

Today’s Resources

Project 1 Schedule
  • 9.25 – SUBMIT P1; P1 Final Presentation; Begin P2; Lecture: Principles of Motion Graphics

Final Presentations: For our first project, present to the class your concept and final project. If you run into issues within Vimeo, do not worry about uploading the final to Vimeo, but upload to D2L Project 1 assignments folder. For your rationale/presentation, describe the concept (narrative, mood, contrast, and formal) and formal choices. Remember to include both the name of your typeface(s) and WHY they were selected to support your concept. All of your choices should support how you want your work to feel.

AE – Adobe MAX Conference Sign-Up

We will not have any new demos in AE this week as you finalize P1 and begin P2. Next week, we will continue with image masks, the pen tool, bezier shapes, adjustment layers, and effects.

This week, I would like you to sign up for the Adobe Max Conference (free online) and begin looking at the sessions (below) in After Effects (or Photoshop, InDesign, and Illustrator) you would like to attend end of October.

Adobe MAX is one of the biggest events for graphic designers, VFX artists, web designers, and more from around the world to come together and explore what’s next for creatives.

View the Session Catalog

https://max.adobe.com/max-online/

Adobe Max Guide

Post navigation

Due Next Class: Final Project 1 (submission guidelines on last post)

Exercise 2 due next Tuesday

9.18 | p1 final crit

Due Today: 20-30s of P1 rendered (uploaded to Vimeo or D2L and ready for full class crit)

For Today: Full Class Crit

Final Considerations:

  • Does your kinetic motion design support or hinder your audio?
  • The what: typographic choices communicated in a planned sequence
  • The how: use of spacing, timing, speed, pacing, and movement
  • Consider how positive/negative forms change through motion and transition.
  • Give attention to the manner elements appear and leave the frame.
  • Consider how the text interacts WITHIN the frame’s edges.
  • Do your formal choices express your motion?
p1_rubric-2-1
Project 1 Submission:
  • Project 1 Final: Upload your final files in a ZIPPED folder named “lastname_p1_kineticType” to the assignments folder on D2L “Project 1”.
    • In zipped folder, FINAL .aep file
    • In zipped folder, FINAL movie rendering @1080p or 720p (do not need process renderings)
    • In zipped folder, Design Boards (file for download) (2.5 pts) – process video below
  • Also, upload final motion design to Vimeo (if possible).
  • On Medium, all process work (PDFs, JPEGs, PNGs) needs to be on Medium post (not in zipped folder)
  • 3 audio selections and initial ideation
  • brainstorming/sketches
  • mood boards / type exploration
  • motion script
  • storyboard
  • 3 styleframes
  • 2s motion test
Design Board how-to

Project 1 due 9.25

Exercise 2 Due 9.30

9.16 | spatial + track mattes

Due Today: Continue development of P1; Exercise 1 

For Today: Demo: “Flip the Bird” Spatial Interpolation + Track Mattes; Studio for E2 + P1 motion design development

bird.png (right click to save)
AE Resources

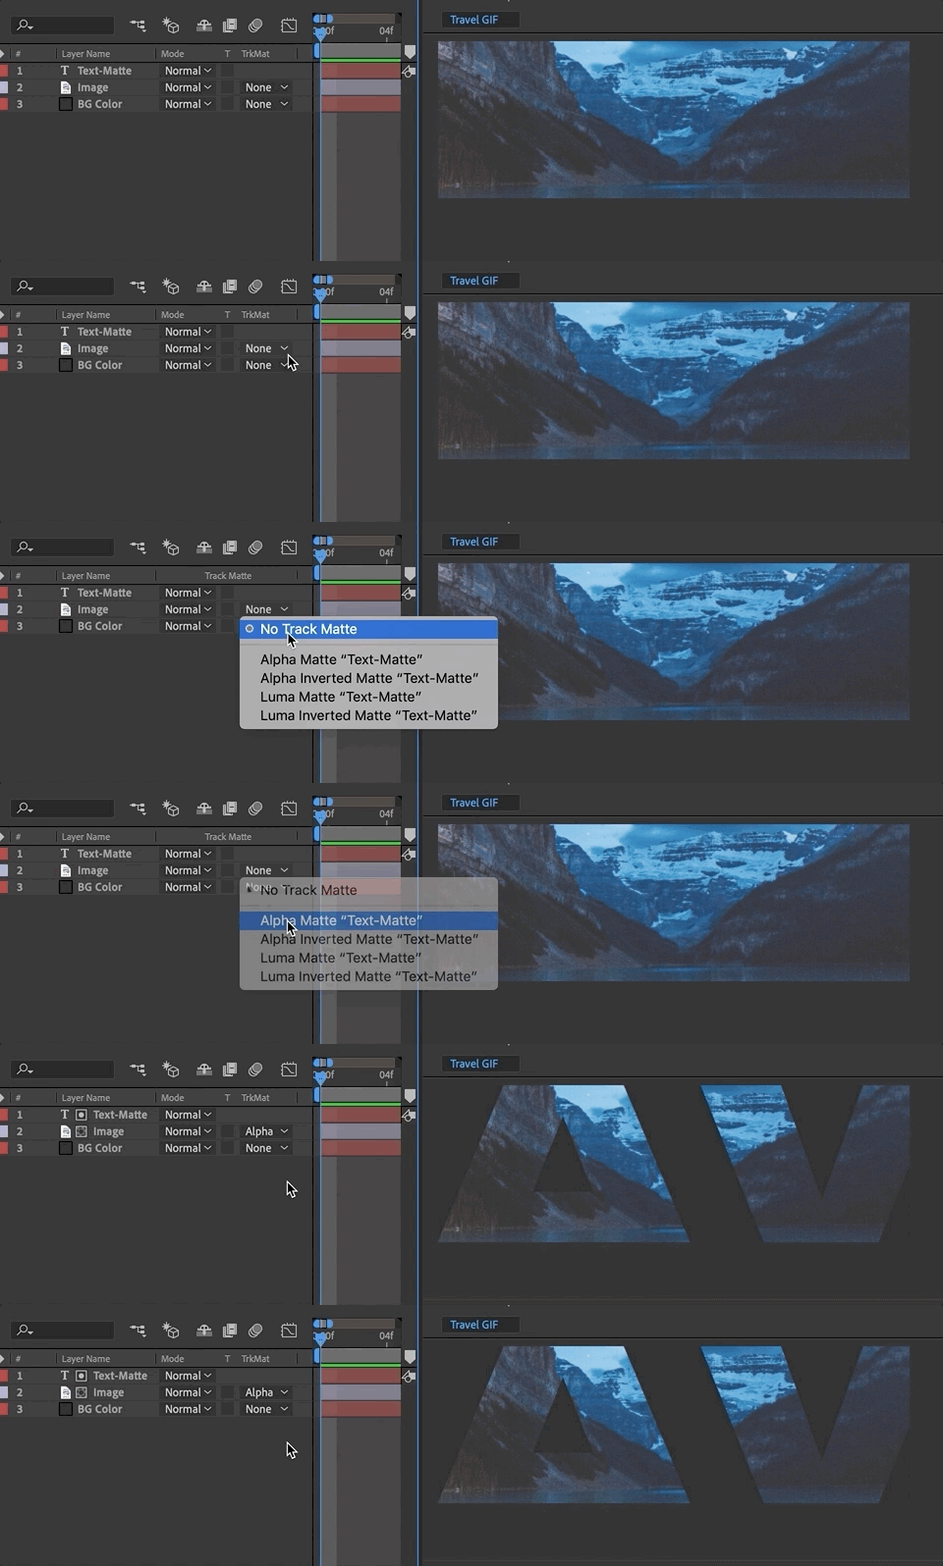
Compositing is placing one image on top of another (such as text on a photo). Mattes are used to isolate one portion of an image—such as a layer mask or track matting where one layer references the transparency of another layer.

Spatial Interpolation + Track Matte Demo

Issues with AE?
Cached Preview Error: https://www.schoolofmotion.com/blog/cached-preview
Space in AE: https://www.schoolofmotion.com/blog/ram-after-effects

Exercise 2

This is the second of 4 exercises in this course. Please review the requirements and rubric before beginning.

Exercise 2 Steps

Exercise 2 Rubric


For Next Class

  • P1 20–30s of motion design. Render BEFORE class and upload to Vimeo or D2L discussion (30s) for full-class crit.

Due 9.30

  • Exercise 2: Watch the 2 falling forms vids above for guidance. Once complete, upload to D2L Exercise 2 (upload to Vimeo, if possible, and upload link, (watch videos under today’s resources for additional guidance).
Project 1 Schedule
  • 9.16 – Demo: Spatial Interpolation + Track Mattes; Studio
  • 9.18 – P1 Final Crit #3 (20–30s)
  • 9.23 – Lecture: History of Motion Graphics; Studio
  • 9.25 – SUBMIT P1; P1 Final Presentation; Begin P2 – Lecture: Principles of Motion Graphics

9.11 | interpolation, graph editor, e2

Due Today: 10s of motion design for critique (upload to Vimeo or D2L Assignments “Vimeo Overflow”)

AE Keyboard Shortcuts

  • (s) scale, (p) position, (a) anchor point, (r) rotation, (t) opacity
    hold shift to select multiple
  • (u) see all keyframes for layer
  • (u + u) to see all adjusted properties
  • (+) or (-) to expand or zoom on timeline
  • (,) or (.) to expand or zoom composition panel, (shift + /) to fit to screen
  • (j) or (k) key to jump between keyframes in timeline
  • (shift + cmd + n) apply mask over text layer
  • (cmd + double-click) on pan behind (anchor point tool) to center anchor point
  • * add marker on timeline
For Today:
  • P1 Crit
  • Demo: Easing + Keyframe Interpolation, Parenting, & Graph Editor, Review Audio Guidelines

linear interpolation: Moves at a constant, steady speed between keyframes, like a mechanical motion. There’s no acceleration or deceleration.
example: elevator sliding up
bezier interpolation: Gives you precise control over the motion by adjusting handles manually. This allows for sharp curves and custom paths for smooth or dramatic changes. This is ideal when you need very specific control over acceleration, deceleration, and movement paths.
example: a bouncing ball manipulating the sharpness of the bounce
auto bezier interpolation: default spatial motion (moving objects) / AE automatically smooths the rate of change between keyframes, making it great for creating naturally curved motion paths.
example: a smooth camera pan or a drone flying through the air—you want the path to be curved but don’t need to manually control every part of it.
continuous bezier interpolation: auto smooth rate of change / AE automatically smooths the motion path for continuous, flowing movement. It’s a balance of manual control with automatic smoothing.
example: a leaf drifting through the wind—smooth, flowing movement with some control over how the leaf move through the air.
hold interpolation: only for temporal value / Used for sudden changes, like switching between two different values instantly without any smooth transition. Ideal for creating abrupt shifts in appearance.
example: a light turning on and off—abrupt changes.

AE Keyboard Shortcuts + Tips

  • (right click) on keyframe > keyframe interpolation to change temporal or spatial interpolation
  • (right click) on keyframe > keyframe assistant to add easing to keyframes
  • (control + 8) set marker
  • (cmd + click) on keyframes to change to auto or linear keyframe
  • (option + click) on properties to move entire motion path OR select all keyframes
CONCEPT

NARRATIVE: 
What is happening in your scene? 

MOOD:
What is the overall feeling?

CONTRAST:
Is there an inherent or defined contrast you are building from?

FORMAL CHOICES:
Then…how are your design choices communicating the above?

3–5 things you want to change.
Today’s Resources

AE Demos


https://medium.com/@gordonnl/ease-in-or-ease-out-ed9a0969042e

linked to original file: https://dribbble.com/shots/2315008-The-key

Curves = Acceleration and Deceleration

  • A curved line means speed is changing. If the curve is going up, the object is speeding up (accelerating). If it’s going down, the object is slowing down (decelerating).
  • When you see handles on the keyframes, use them to manually adjust how fast or slow the object moves. The longer you stretch the handle, the more gradual the change.
  • Flat Lines = constant speed.
  • Steep Curves = fast changes.
  • Shallow Curves = slow changes.
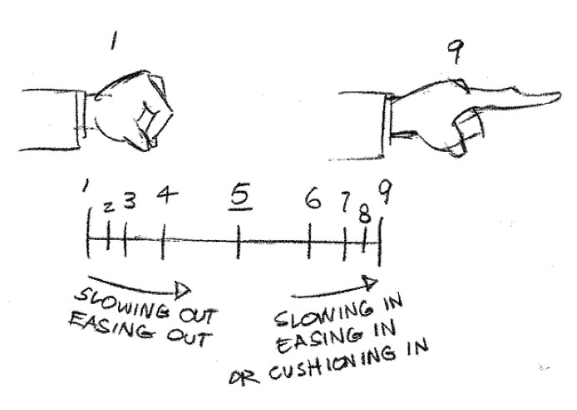
  • Use Easy Ease to quickly smooth out your animation. After Effects will automatically create a curve to help an object slow down or speed up gradually. This is great for a natural-looking animation.
  • Ease In: Starts slow, then speeds up (like accelerating from a stop).
  • Ease Out: Starts fast, then slows down (like braking a moving car to a stop).
  • Keep Learning: Create better eases in AE & Roving Across Time with Roving Keyframes

Audio Guidelines for Motion Graphics:

  • Keep overall audio levels below -6dB to avoid distortion and provide headroom for adjustments.
  • Dialogue/voiceovers should sit between -12dB and -6dB for clarity, and background music should be quieter, between -18dB and -12dB.
  • Use keyframes to fade audio in and out at the start and end of your motion videos for smooth transitions.
  • Balance audio layers (dialogue, sound effects, music) so no single element overpowers the others unless intentional.
  • Monitor audio levels using the Audio Meters panel (found under Window > Audio Meters) to ensure consistency and avoid peaking above 0dB.
  • Keep sound design simple—audio should complement, not distract from, the visuals.
  • Keep Learning: https://www.premiumbeat.com/blog/sound-in-after-effects/
Looking Ahead
  • Continue developing P1 motion design for 9.25 due date (remember to document all process work).
  • 20–30s due next Thursday for final crit.
  • Exercise 1 due next Tuesday, Sept 16th

Project 1 Schedule
  • 9.16 – Demo: Track Mattes; Lecture: History of Motion Graphics (may move to later date); Studio; Assign E2
  • 9.18 – P1 Final Crit #3 (30s)
  • 9.23 – Exercise 2 Due; Studio
  • 9.25 – SUBMIT P1; P1 Final Presentation; Begin P2; Lecture: Principles of Motion Graphics

9.9 | text animators, precomposing, audio

Due Today: Storyboards + P1: 2s Motion Test

For Today: Discuss: Motion Design Process; P1 Small Groups;Demo: Precomposing, Nesting, Text Masks, Text Animators, Audio Import

Motion Design Process
3-motion-design-process-v2-1

AE Keyboard Shortcuts

  • (s) scale, (p) position, (a) anchor point, (r) rotation, (t) opacity
    hold shift to select multiple
  • (u) see all keyframes for layer
  • (u + u) to see all adjusted properties
  • (+) or (-) to expand or zoom on timeline
  • (,) or (.) to expand or zoom composition panel, (shift + /) to fit to screen
  • (j) or (k) key to jump between keyframes in timeline
  • (shift + cmd + n) apply mask over text layer
  • (cmd + double-click) on pan behind (anchor point tool) to center anchor point

AE Demos

AE Resources
Audio Resources

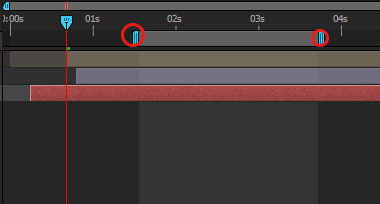
Important Note on Rendering: To render out a portion of your work rather than an entire composition, resize the work area on the right side of your timeline panel. The work area selected is the ONLY portion that will render out through the Adobe Media Encoder.

Due Next Class
  • 10s of Project 1 rendered before class WITH your audio. Do not upload to Vimeo or D2L, but have ready to play on your computer for critique. If necessary, continue revising storyboard or styleframes per feedback received in crits this past week. Note: Bring headphone for crit.

Due Next Tuesday

  • Exercise 1

Project 1 Schedule
  • 9.9 – Demo: Compositions/Masks/Audio Sources; Small Group Crit
  • 9.11 – Demo: Keyframe Interpolation/Time Remapping/Parenting/Graph Editor/Audio; Exercise 2; P1  Crit #2 (10s)
  • 9.16 – Demo: Track Mattes; Lecture: History of Motion Graphics; Studio
  • 9.18 – P1 Final Crit #3 (30s)
  • 9.23 – Lecture: Principles of Motion Graphics; Studio
  • 9.25 – SUBMIT P1; P1 Final Presentation; Begin P2 


9.4 | ae: rendering, p1 crit 1

Due Today: AE Demo: Part 2; P1: 3 Styleframes (posted to Medium before start of class)

For Today:

  • Rendering using Adobe Media Encoder
  • Create free Vimeo account and submit to THIS FORM
  • P1 Small Crit #1 – Styleframes (split crit)
Exercise 1 Render + Submission: 

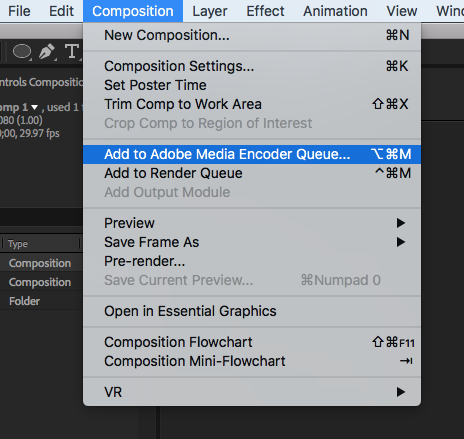
Include all elements in one composition and send to Adobe Media Encoder (wait a moment for application to open).


Select Format: H.264, Preset: Vimeo 1080p HD (final projects) or Vimeo 720p HD (exercises or drafts of projects)

Upload to Vimeo (500MB upload limit per week). 

Copy/paste your Vimeo video link to email and send to cass.reese@gmail.com (subject: Exercise 1). Remember to include your last name in all filenames! 
Today’s Resources
Due Next Class
  • Remember to post your audio research to your Medium.
  • Type out your full script and post to Medium.
  • Storyboard: Reference your transcript of audio. Upload to the bottom of your Medium Process story you created last week. (suggested methods: index cards OR .ai artboards OR storyboarding paper above): Brings together the script with the visuals. Minimum of 12 frames that indicate framing, as well as how elements will enter, exit, move throughout the frame. Indicate significant events. Write corresponding audio script on back (index cards) or next to artboard (ai) and number the sequence.
  • Text Animation Motion Test (2s+ test on initial motion) Develop 2s in AE. Select any scene in your storyboard for this motion test. Render. Post to Vimeo + Import to the bottom of your Ideation Story on Medium. Looking ahead, 10s will be due next Thursday.

Due Tuesday 9.16

  • Exercise 1 (upload to Vimeo).

http://threesixtyeight.com/insights/storyboarding-motion-graphics/

9.2 | ae demo + e1

Due Today: P1: concept brainstorming/ideation, thumbnail sketches, typeface exploration, & moodboard

For project 1, use type creatively through various typographic treatments such as manipulating the tracking or leading to create rhythm; changing the opacity, size, or weight to create contrast; distorting through pulling, pushing, or blurring; exploring outlines, layering, or using type as a texture. Keep placement and transitions consistent. Allow enough time for the viewer to read text.

For Today: Demo: Interface Review, Keyframe Basics, Shapes Layer vs Solid Layer, Single Compositions: Layers, Trimming, Splitting, Text Layers, Importing PSD vs AI (DemoFiles), assign Exercise 1

Demo Files – PSD Text File

Demo Files: http://id2.cassreese.com/wp-content/uploads/2018/02/text.psd (copy and paste to URL bar if issues)

Exercise 1 – Due Tues 9.16

This is the first of 4 exercises in this course. Please review the requirements and rubric before beginning.

Exercise 1: 
Create a 5-10 second After Effects composition that animates a shape and personal mantra or quote. This exercise introduces basic animation techniques, file setup, and design principles.

1. File Setup and Management:
- Create a composition in After Effects with a duration of 5-10 seconds and dimensions of 1920 x 1080 pixels.
- Set up your project with a solid color background using a solid layer.
- Save and manage your files properly, including organizing assets in your project folder.

2. Shape Creation and Animation:
- Design a shape (e.g., circle, square, triangle) that symbolizes something personal to you.
- Animate this shape to move across the screen, incorporating both rotation and position changes. The movement should be smooth and visually engaging.

3. Text and Importing:
- Choose a personal mantra or quote that resonates with you.
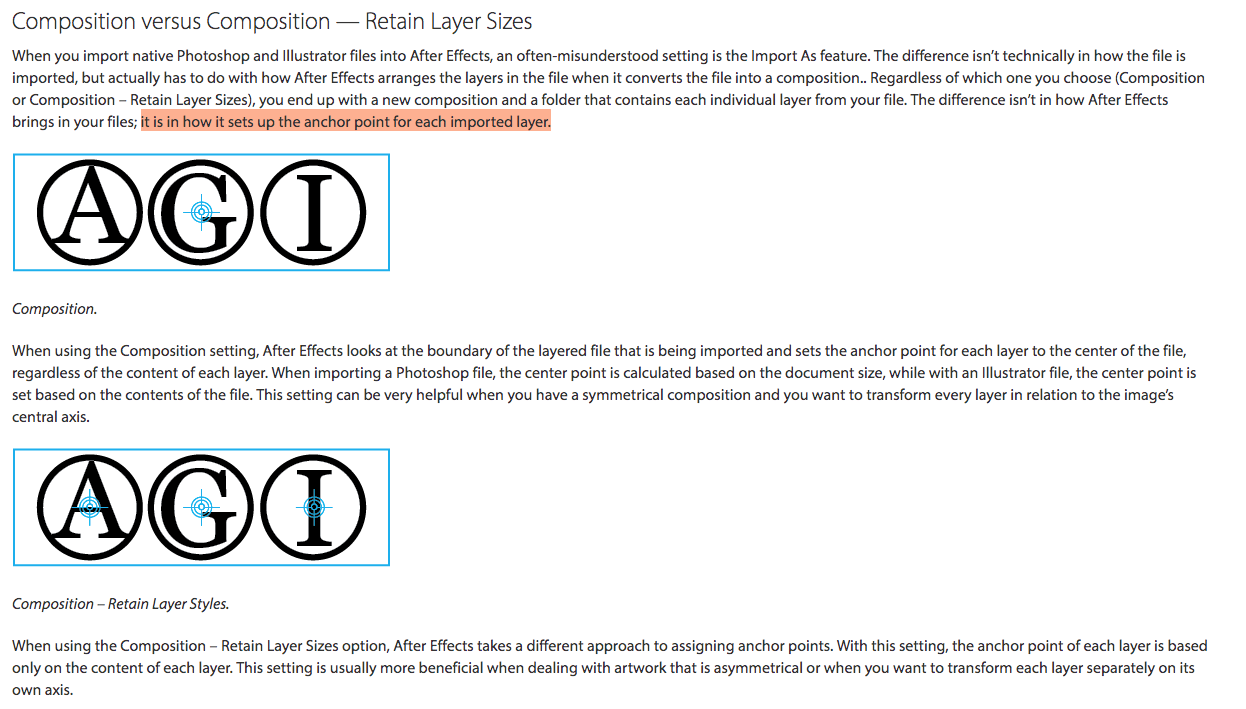
- Create a .psd file with your text, ensuring the text is spread across multiple layers. Import the .psd file into After Effects as a composition retaining layer sizes.(You can use Illustrator, just remember to export as a PSD)
- Animate the text to convey the meaning or emotion behind the quote, ensuring it complements the movement of the shape.

4. Animation Techniques:
- Focus on the choreography of your animation, considering how the shape and text move together over time.
- Pay attention to timing, pacing, and how these elements contribute to the overall tone and message of your composition.

5. Formal Design Qualities:
- Ensure your composition demonstrates strong visual design, including effective use of type, color, scale, and space.
- Strive for balance, contrast, and a clear visual hierarchy that enhances the message of your personal mantra or quote.

6. Rendering and Submission:
- Render your composition in H.264 format with the Vimeo 720 preset.
Upload your final video to Vimeo and submit the link.

Exercise #1: Personal Mantra in MotionWEAK / MISSINGAVERAGEGOODEXCEPTIONAL
File Setup and Management: Composition between 5–10s; Dimensions 1920 x 1080; Vimeo Setup; Solid Layer setup02.252.53
Shape: Shape represents a personal value or symbol; moves in rotation and position throughout the scene02.252.53
Text: Personal mantra or quote imported from .psd file; Animation applied to motion text to convey meaning02.252.53
Animation Techniques: Design demonstrates exploration of software skills, choreography of shape and text movement, rotation, or scaling over time; Consideration of pacing and emotion02.252.53
Formal Design Qualities: Visual style; consideration of positive/negative forms within changing space; integration of personal theme with type, color, scale, and hierarchy02.252.53
Kinetic Type Resources
Today’s Kinetic Type Resources
    For Next Class
  • P1 3 Styleframes (1920px x 1080px): A single, STATIC frame that depicts the look and feel. Visual considerations coalesce with narrative, composition, and motion. All choices must be rooted in concept. Each styleframe should be a completely different visual direction and may pull from different conceptual directions. Using the same layout/composition, and simply changing the typeface will result in a grade deduction. Spend time creating three completely different visual directions, and avoid committing to “your favorite” too early on. Each direction should be strong. You will more than likely need to explore more than 3 visual directions to result in 3 strong directions. Consider breaking your design time into a minimum of two sessions (an initial sprint + a refinement session). Upload to the bottom of your Medium Process story you created last week. Post to a story “P1 Kinetic Typography” on Medium. How to post on Medium.
  • Review/Read all of  Today’s Resources

Due Next Thursday 9.11 – Exercise 1

https://www.agitraining.com/adobe/aftereffects/tutorials/importing-multiple-files-in-after-effects?page=2

8.28 | kinetic type + intro to ae

Due Today: 2 kinetic type examples and reflection; begin exploring 3 audio selections (30s–60s) – not due until Tuesday

For Today: Review Medium; Kinetic Type; Review Kinetic Type Examples; Demo: Intro to After Effects; mini group discussions for P1 audio selections

Design Kinetic Type Research F25.pptx


1-introduction-to-motion


When I first started out, I would just jump right into design. I would try to design my way out of a problem and sometimes that works. But, more often than not, you end up a dead end. It definitely helps to know what the concept is first and design from there.
—Lauren Hartstone, Designer/Directer (as quoted in Shaw, 2016)

Today’s Resources

For project 1, use type creatively through various typographic treatments such as manipulating the tracking or leading to create rhythm; changing the opacity, size, or weight to create contrast; distorting through pulling, pushing, or blurring; exploring outlines, layering, or using type as a texture. Keep placement and transitions consistent. Allow enough time for the viewer to read text.

P1 Examples
Due Next Class
  • Reflect and brainstorm on how final audio choice might be able to be expressed typographically. Conceptualize. Consider: how does this audio feel? pacing? Go into as much description as you can.
  • Practice using keyframes and animating shapes.
  • Review Today’s Resources
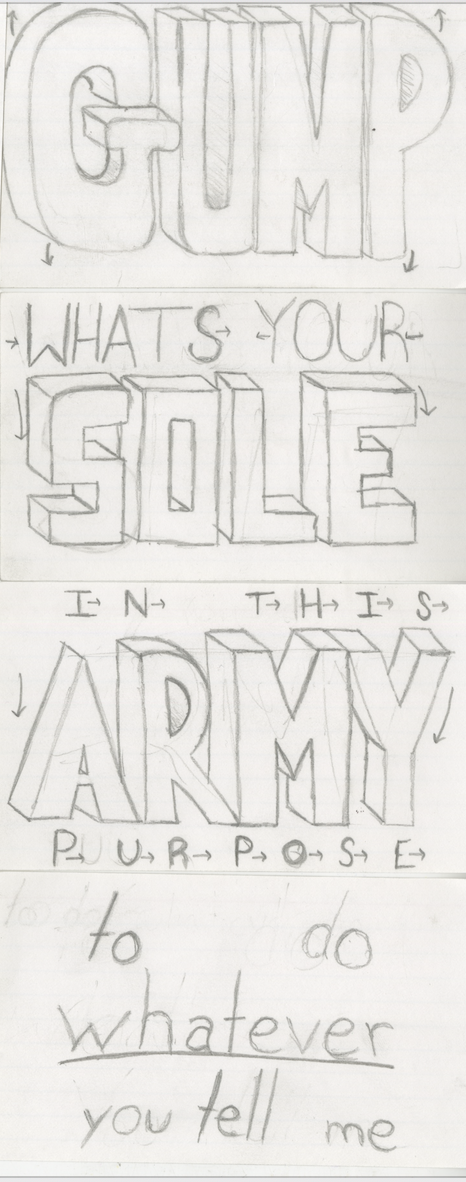
  • P1 Thumbnail sketches (photo document all sketches) + Ideation:
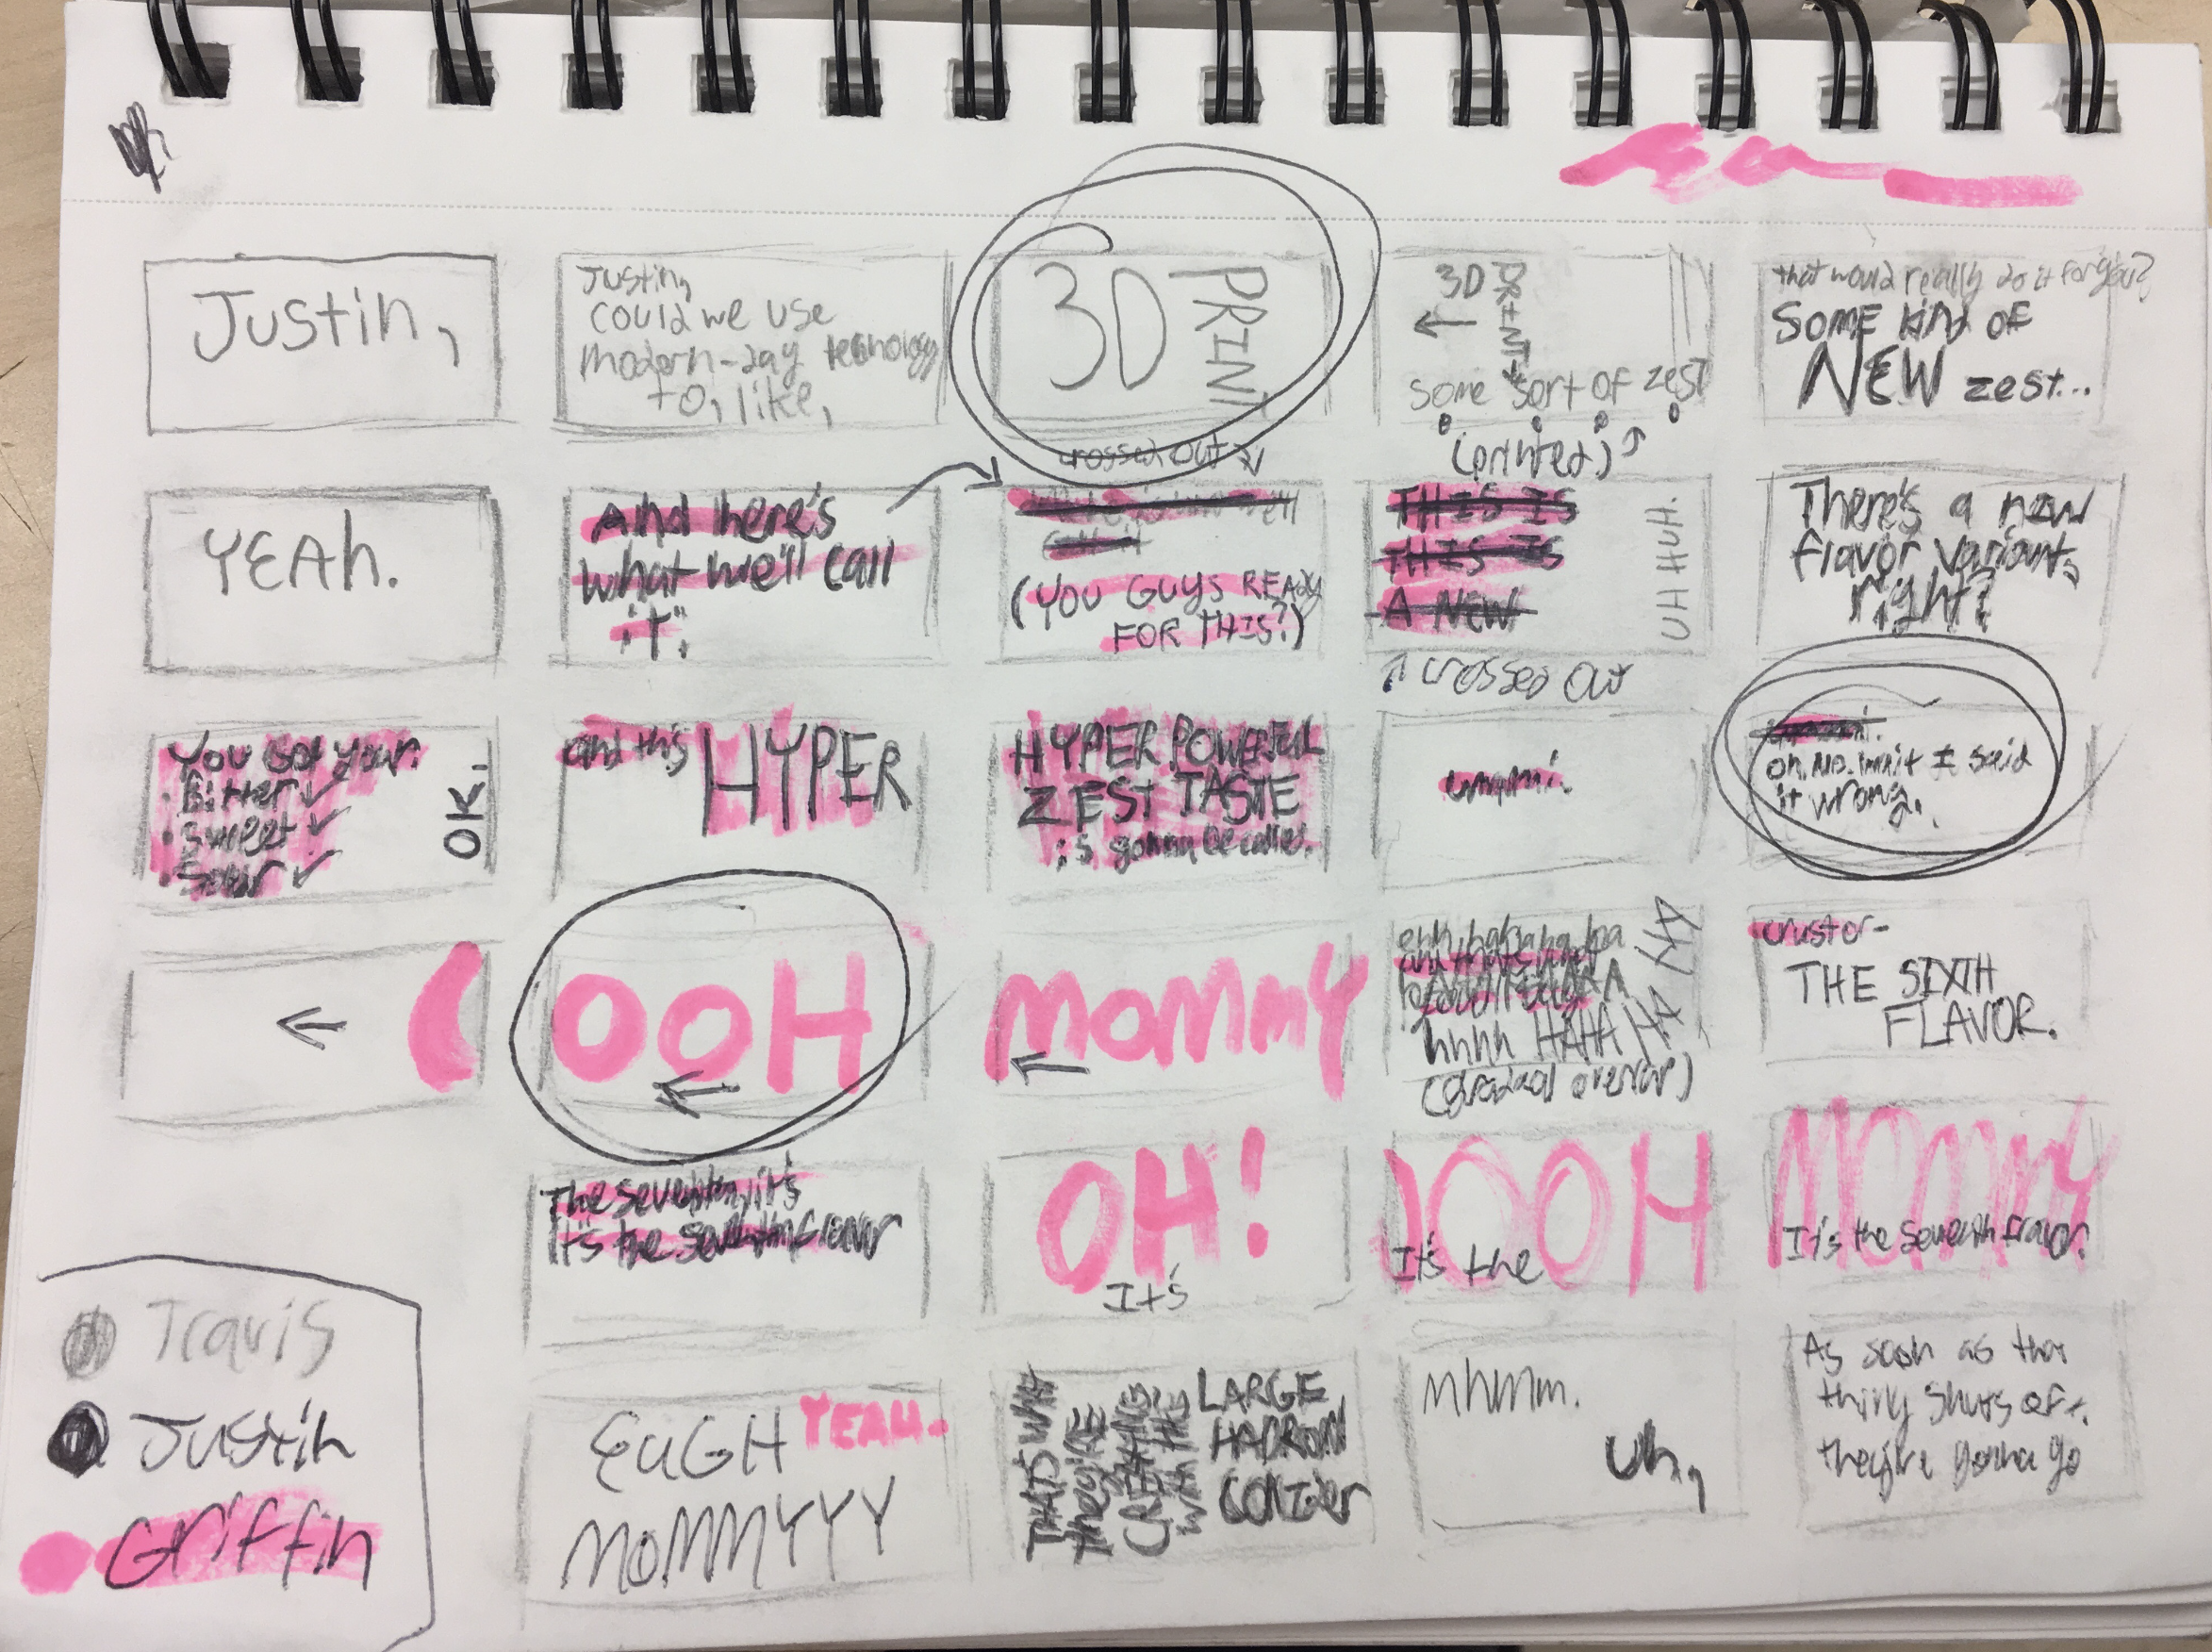
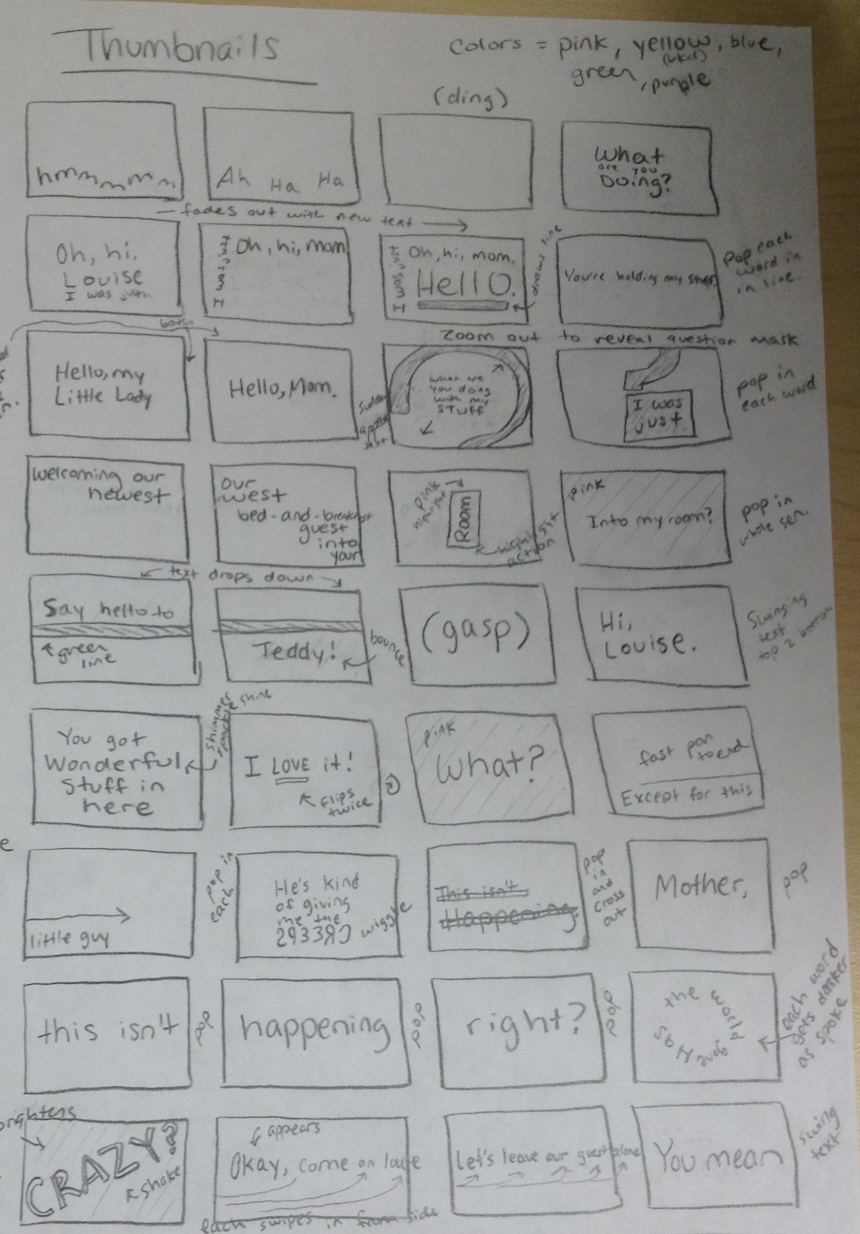
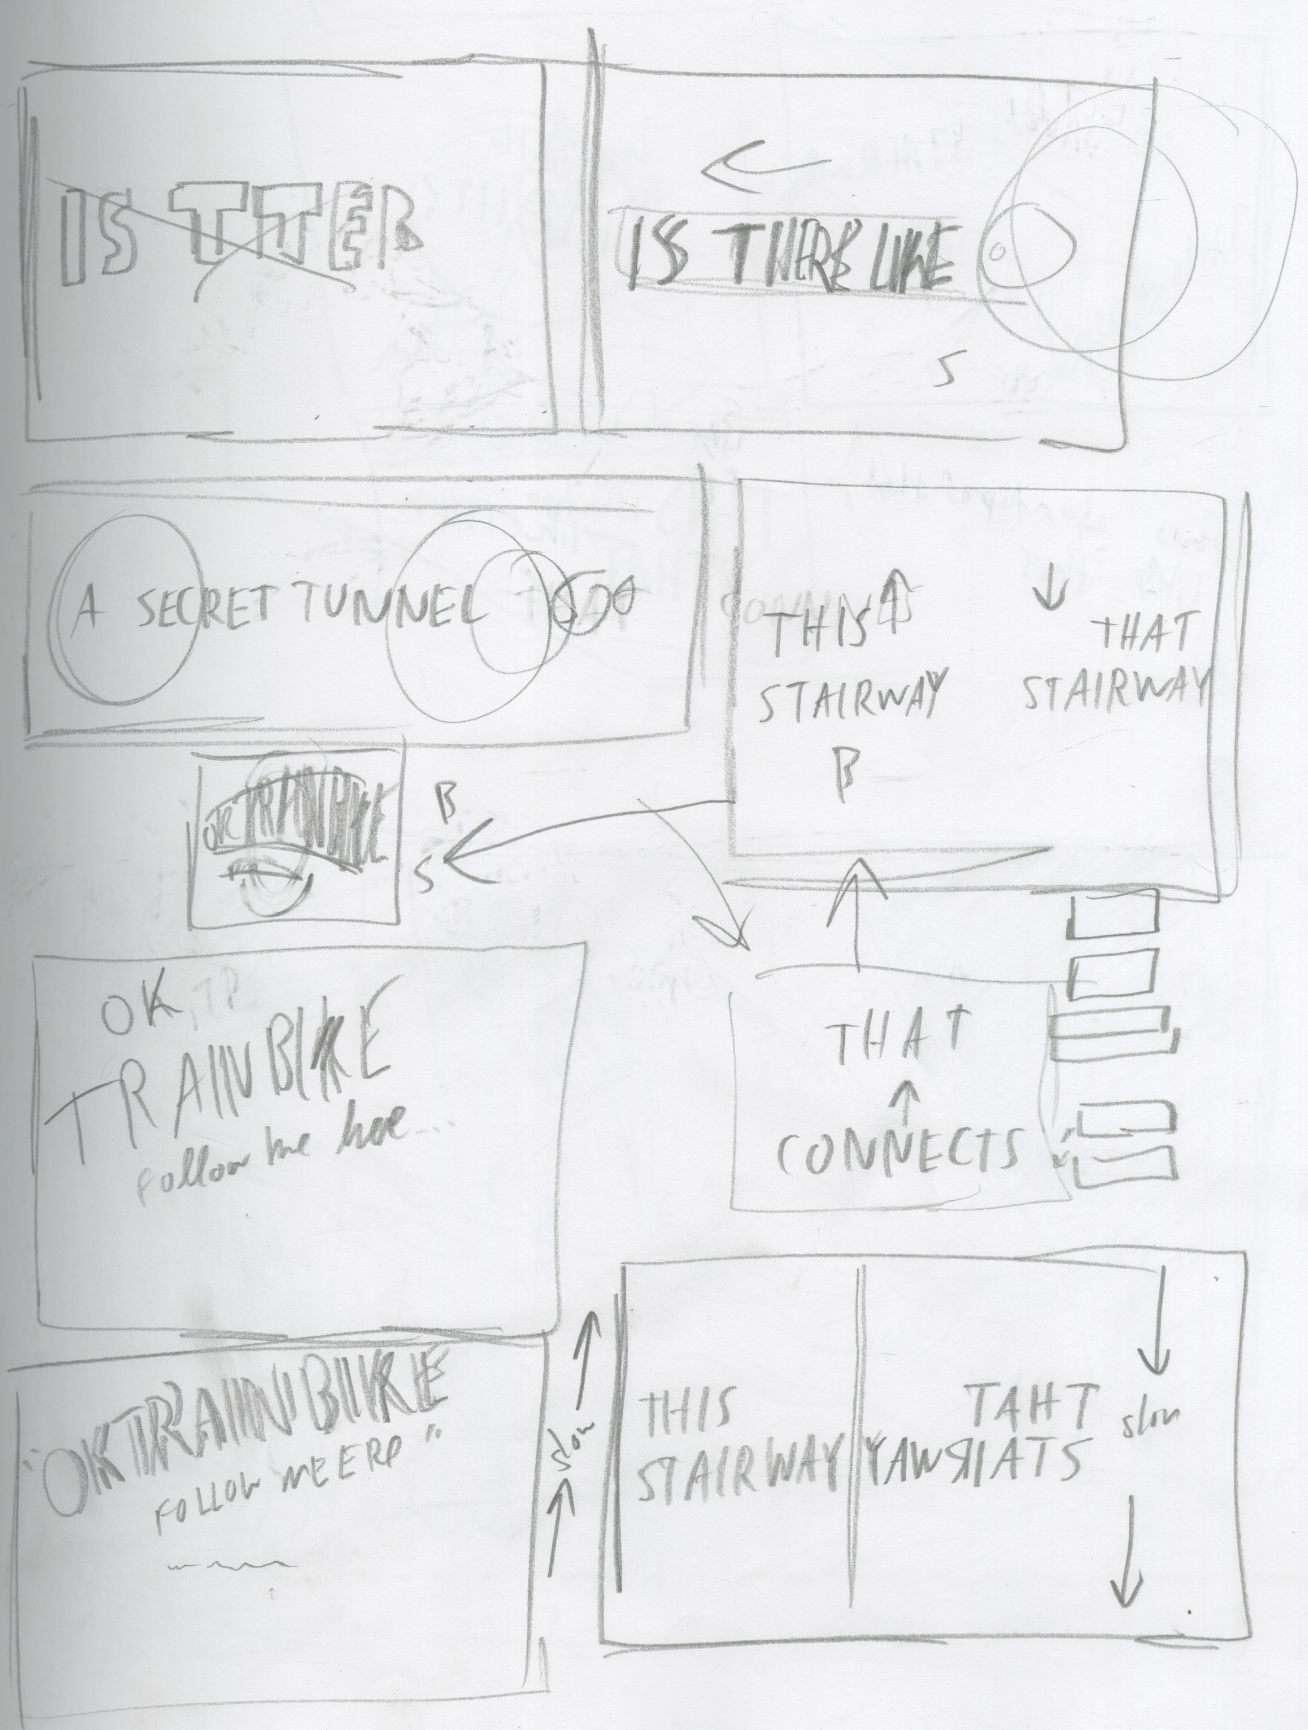
    • Quick, loose drawings that capture your first ideas for how type might move and behave in sync with your audio. These are not polished, but they help you brainstorm. Sketching first helps you generate many options quickly, focus on concept, and avoid getting “stuck” in After Effects too soon. Get started:
    • Start by writing keywords/qualities that describe the emotion, pacing, or mood of your audio (e.g., “playful,” “urgent,” “melancholy”). Consider the mood of the characters.
    • Draw little frames that show how words might enter, move, or exit. Think about rhythm (fast vs. slow), scale (small vs. big), and placement (center vs. off-screen).
    • Don’t worry about style yet—focus on storytelling and motion flow.
  • P1 Type Exploration + Moodboard:
    • Type: Since this project is entirely about type in motion, your typeface choice will drive the tone. For example, a blocky sans serif feels bold and urgent. Consider how you want the type to FEEL. Since the first project is rooted in typography, this can be merged with the moodboard. Get started:
      • Choose 1–3 keywords (e.g., “chaotic,” “lighthearted,” “serious”).
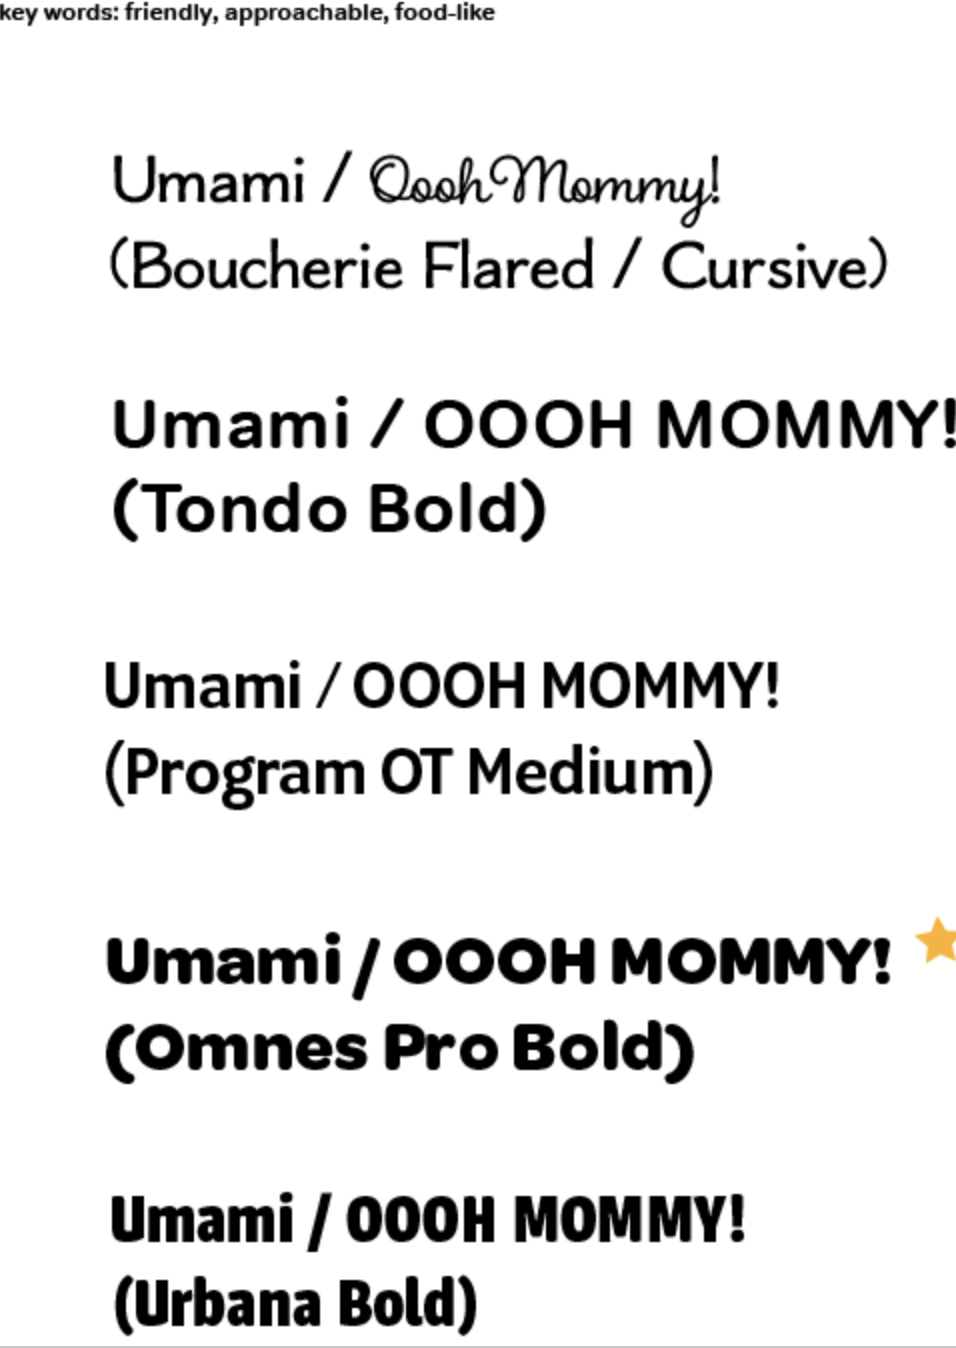
      • For each, pick 3-5 typefaces that embody that feeling. Explore stylistic tweaks like all caps vs. lowercase, stretched vs. condensed, bold vs. thin.
      • Consider non-digital type: hand-lettered, photographed letters, textured/tactile type. Import those into AE to animate.
      • Resources:
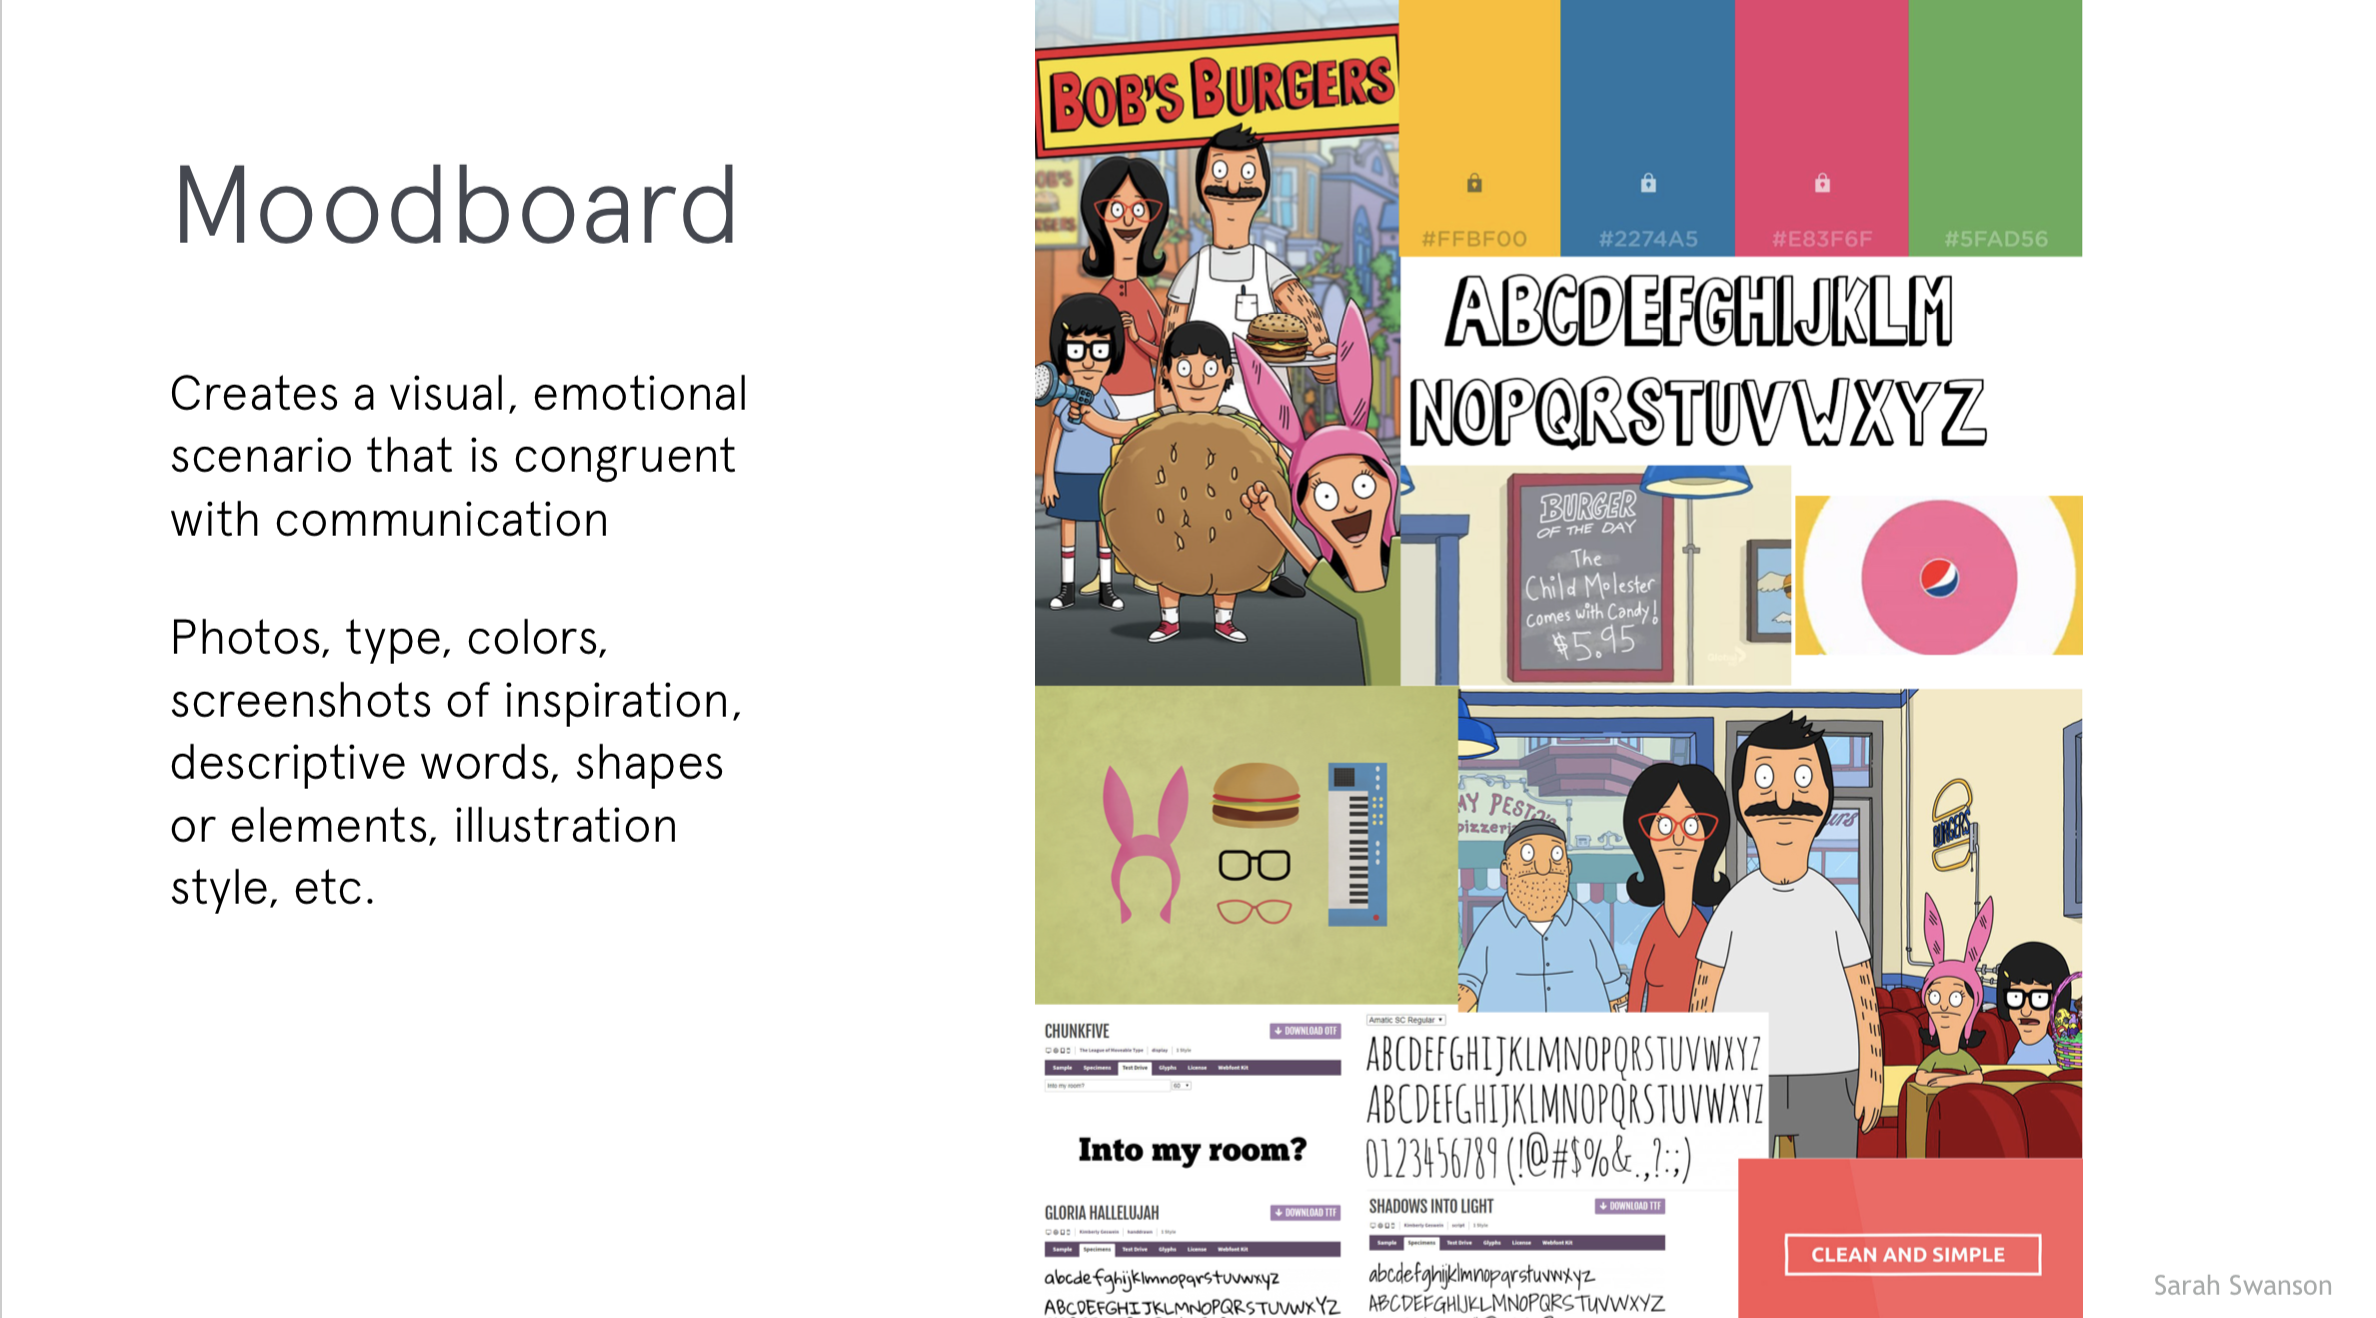
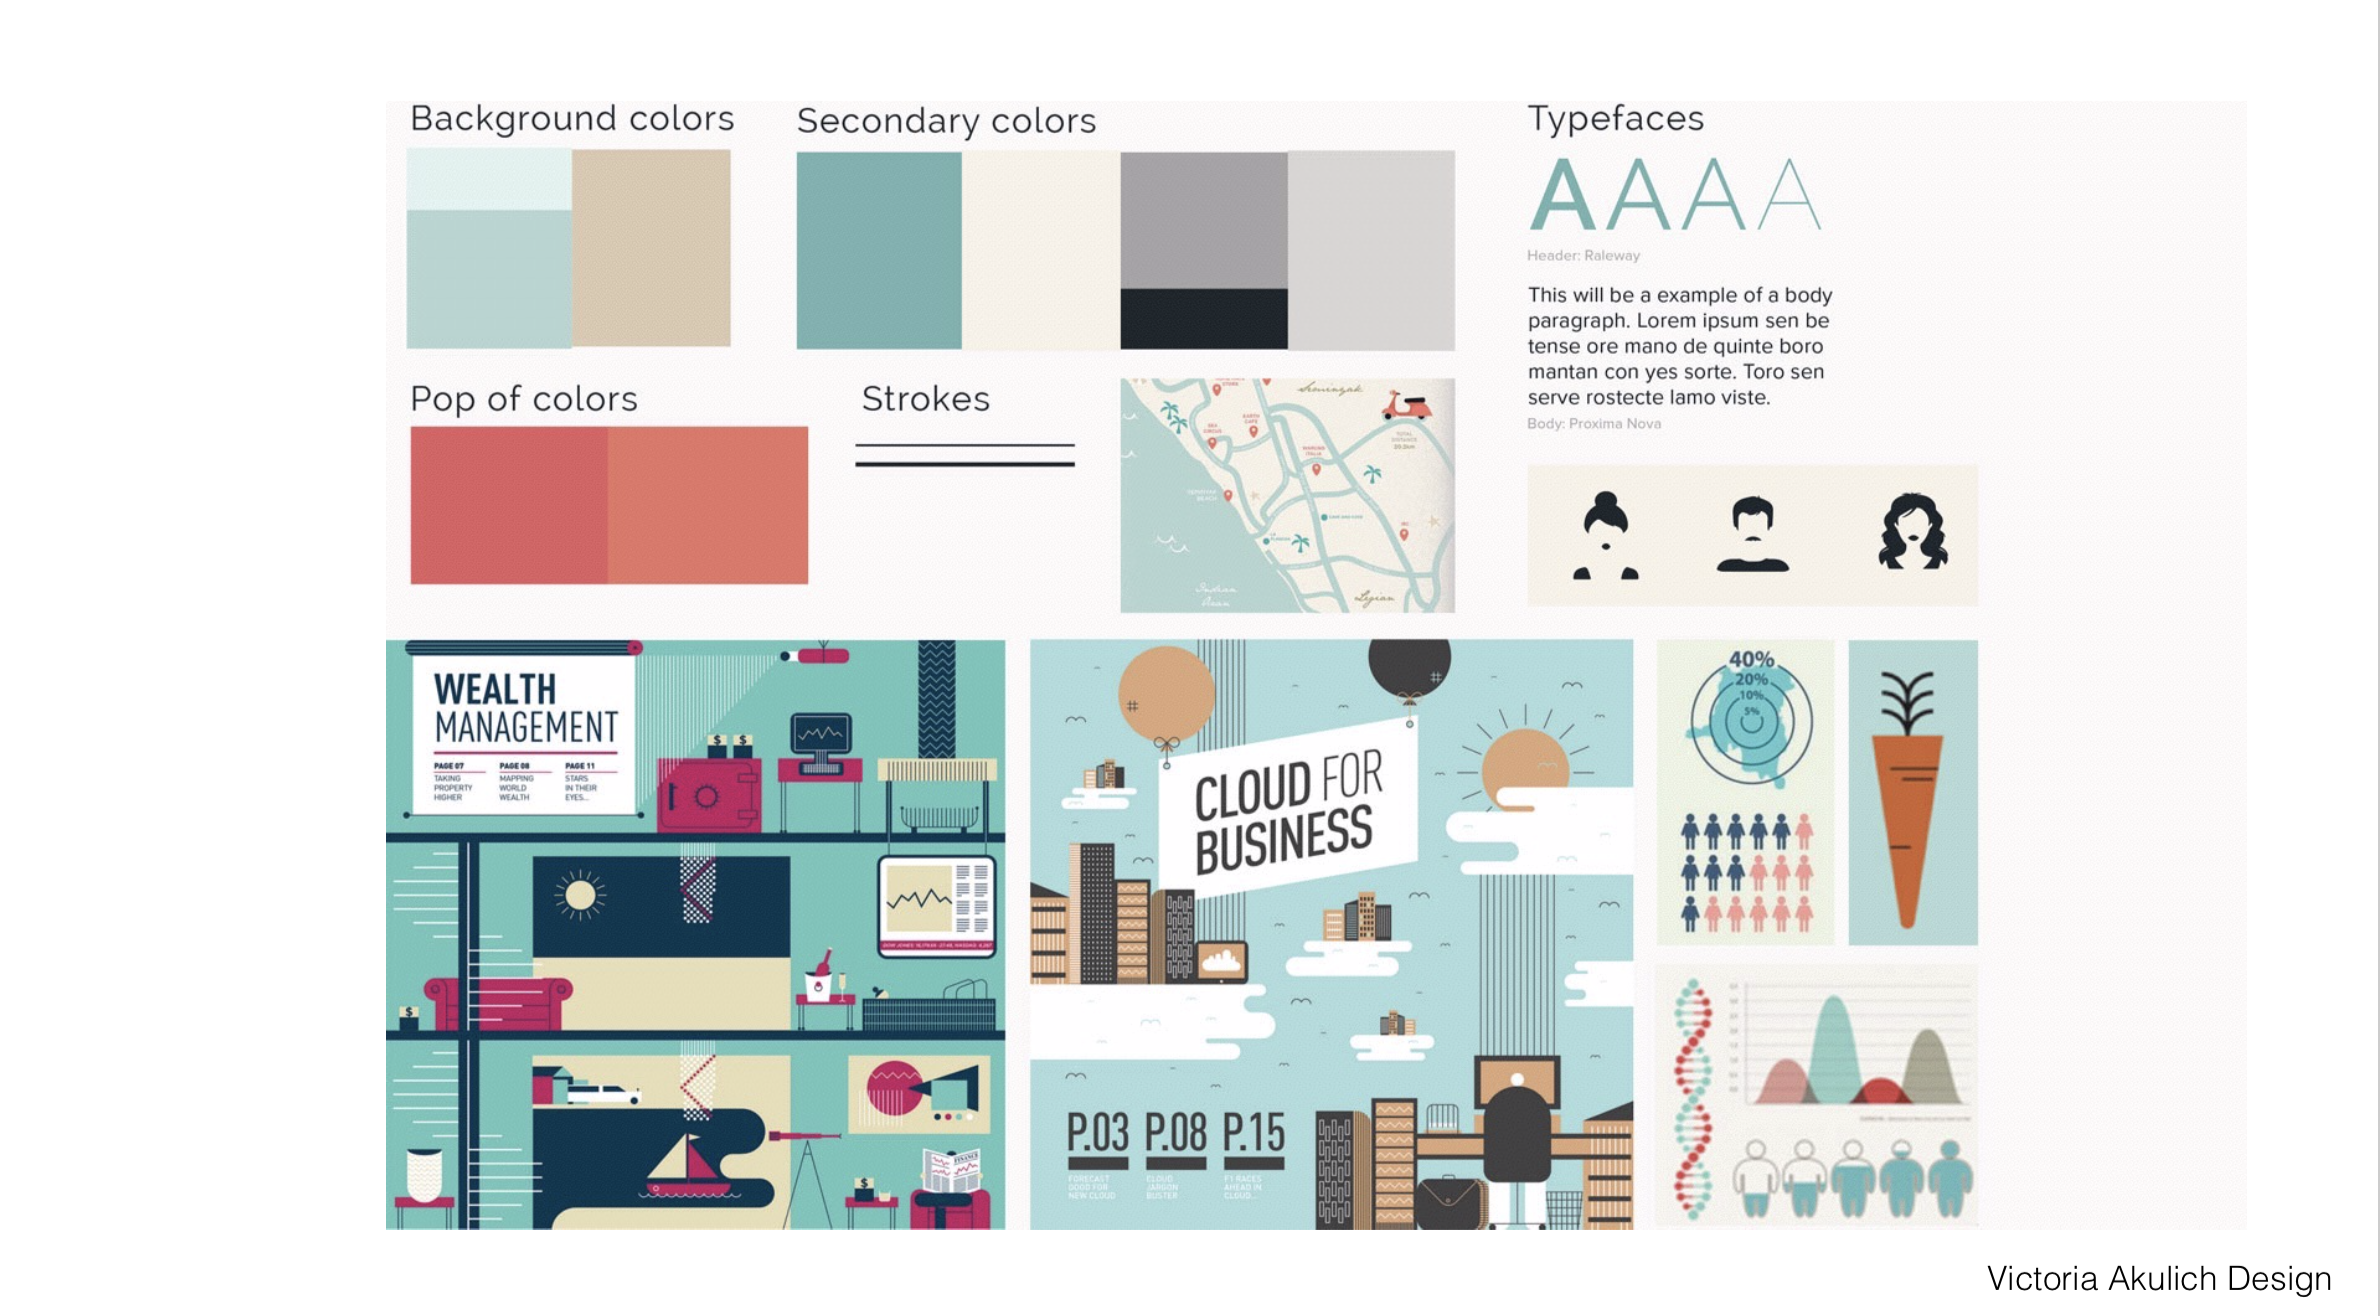
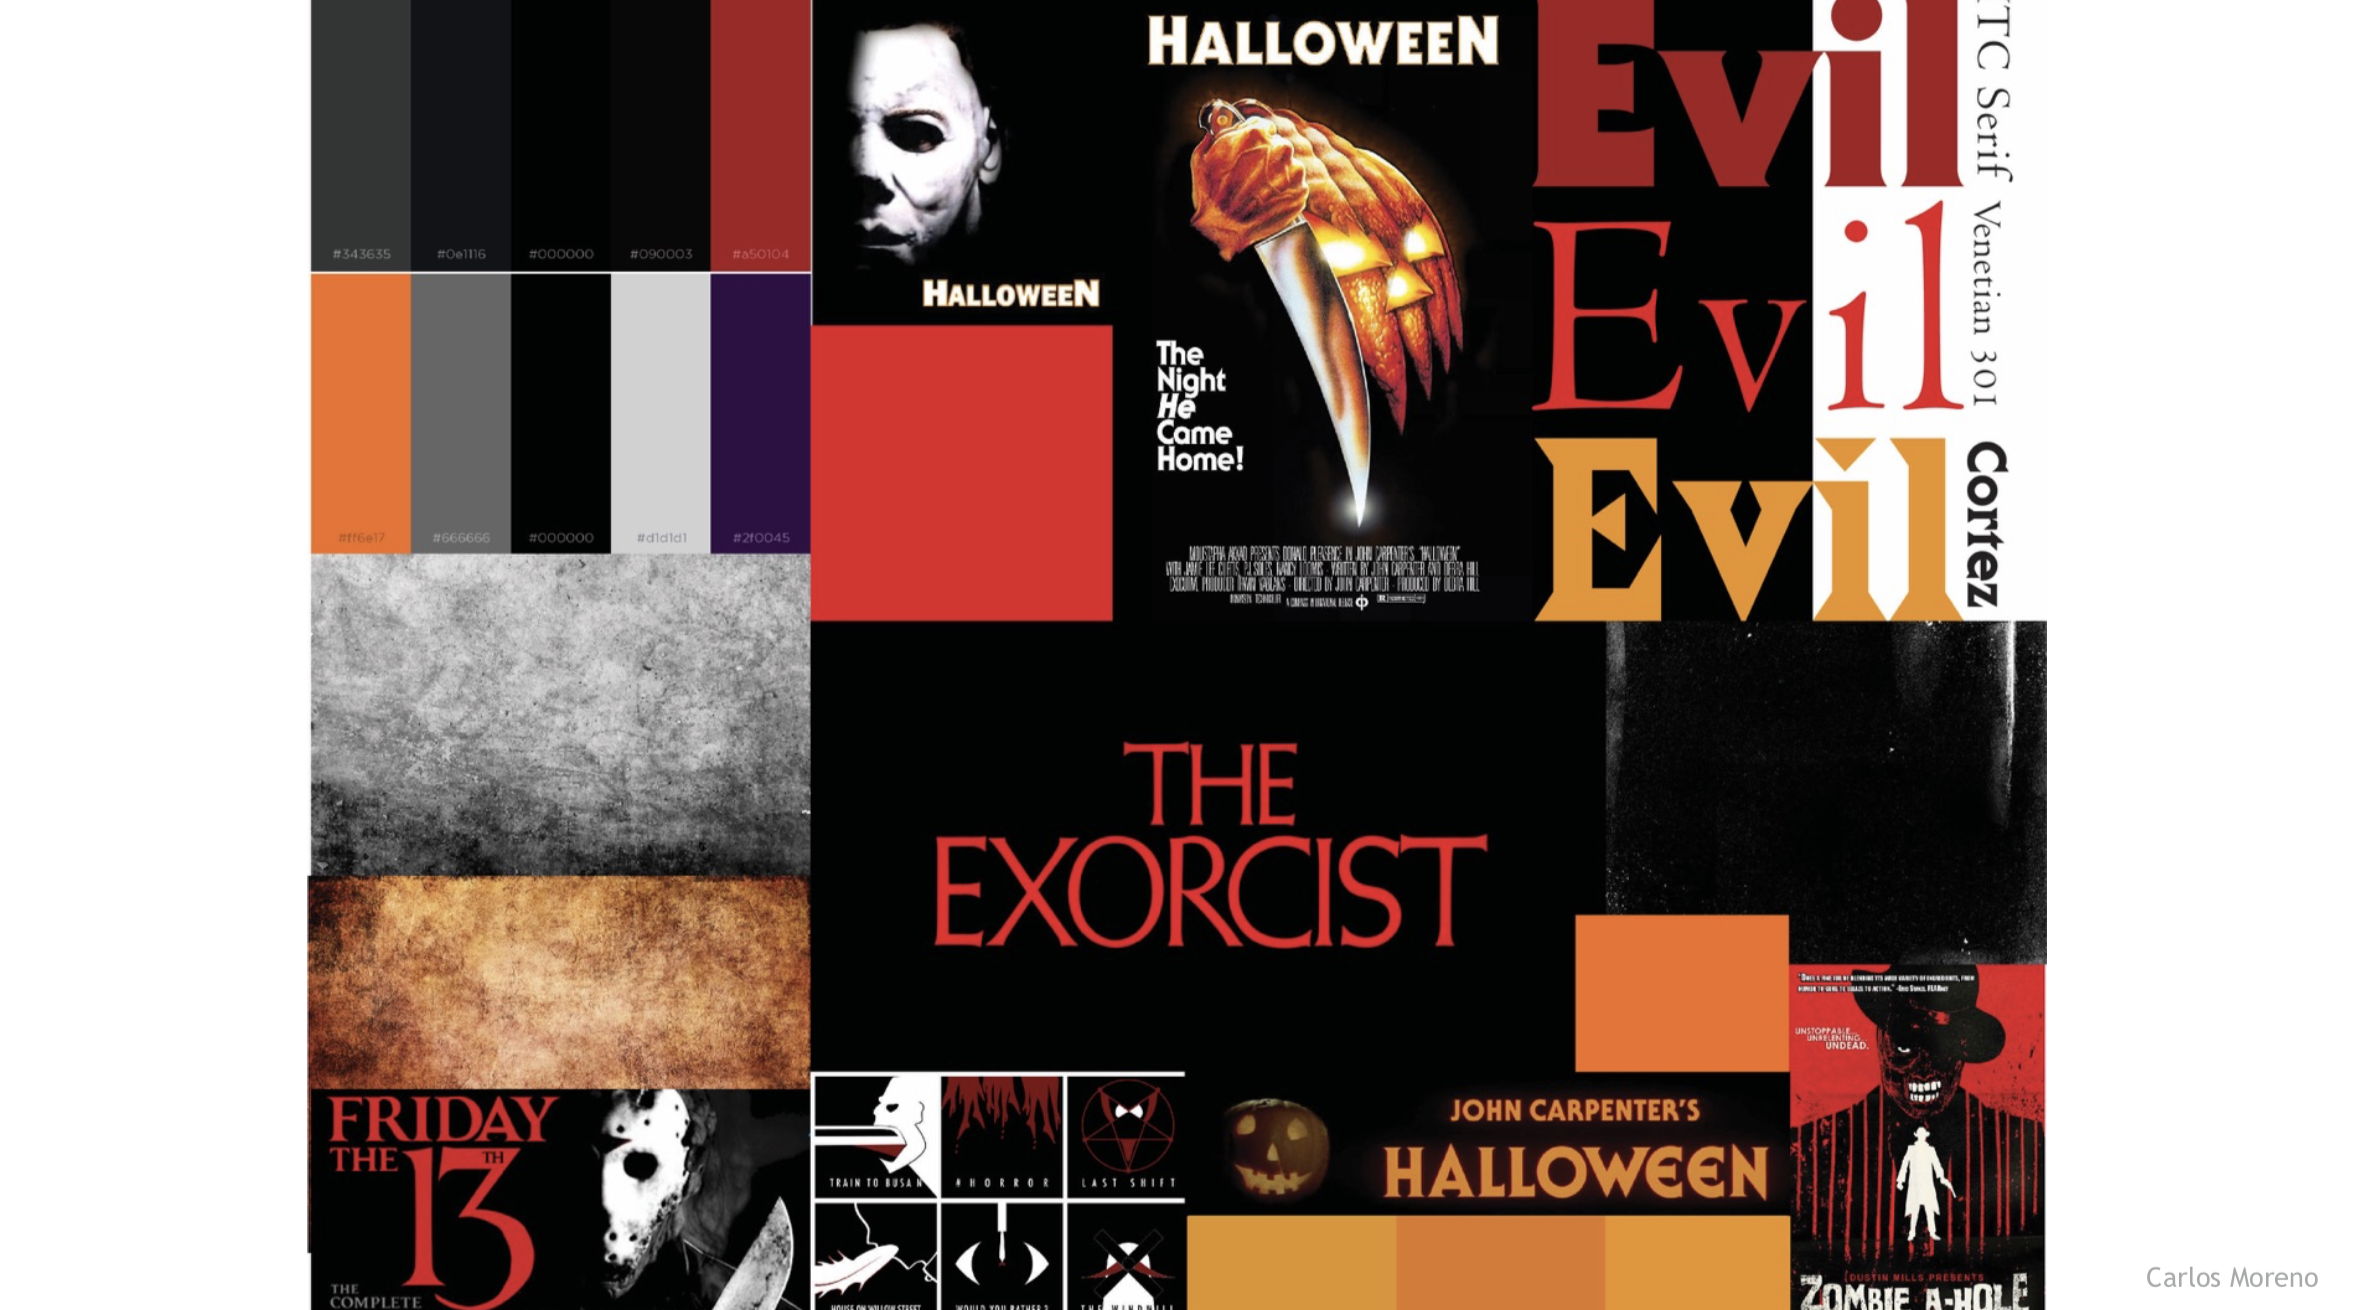
    • Moodboard:
      • A collection of visuals (colors, textures, type examples, design references) that define the overall look and feel of your piece. It ensures your final animation feels intentional and cohesive. Get started:
        • Collect pieces of inspiration: typography samples, color palettes, textures, or imagery that reflect your concept.
        • Organize them in one board (Adobe Illustrator, Photoshop).
        • Make sure your type exploration feeds into this—include your test typefaces.
        • Can be helpful to add notes that connect each choice back to your keywords.


After Effects

Project 1 Schedule
  • 9.2 – Demo: Interface Review/Keyframe Basics/Shapes/Single Compositions+Layers /Importing/Text Tool; Exercise 1; Due: P1: concept development, thumbnail sketches, typeface exploration and moodboard
  • 9.4 – P1 3 Styleframes Due; Vimeo Setup; P1 Crit #1 – Styleframes
  • 9.9 – Demo: Compositions/Masks/Audio Sources; Lecture: Motion Design Process; Small Group Crit
  • 9.11 – Demo: Keyframe Interpolation/Time Remapping/Parenting/Graph Editor/Audio; Exercise 2; P1  Crit #2 (10s)
  • 9.16 – Demo: Track Mattes; Lecture: History of Motion Graphics; Studio
  • 9.18 – P1 Final Crit #3 (30s)
  • 9.23 – Lecture: Principles of Motion Graphics; Studio
  • 9.25 – SUBMIT P1; P1 Final Presentation; Begin P2 

8.26 | intro to motion

Welcome to Motion Design. Below you will find some resources you may find helpful for the first day.

For Today: Course Introduction / Review Syllabus, Complete Survey + Syllabus Agreement; Lecture: Intro to Motion Design; Begin P1 Kinetic Typography

1-introduction-to-motion
Today’s Resources

P1 Examples:

For Next Class
  • Research Kinetic Typography: Research 2 examples of successful kinetic typography. I recommend searching for examples that are either GIFs or include links (with screenshots) to examples on a specific website. GIFS can be saved. If using Google Images, you can go to Tools > Type (GIFs) to search for example (reference screenshot below). Post examples to the Motion Design Kinetic Type Research F25.pptx
  • Kinetic Type Reflection: Why do you feel these two examples are successful?
    Craft a thoughtful reflection (approximately 75-125 words each), diving into the essence of your chosen kinetic typography examples. Consider concept, visual style, timing, sequence, use of story/narrative, etc. Share insights into the visual elements, stylistic choices, and mood that caught your attention. Discuss the effectiveness of the design in conveying the intended message or mood. Focus on the typography’s relationship with motion, and delve into any intriguing design techniques that enhance the viewer’s engagement. Feel free to touch on aspects such as color, font selection, pacing, and visual effects. Aim to provide a concise yet insightful analysis that showcases your critical thinking and artistic observation. Post your reflection next to your Kinetic Type examples in the Motion Design Kinetic Type Research F25.pptx.
  • Begin researching P1 Audio selection: Find 3 potential selections for your audio (30s–60s).
  • Looking Ahead: Reflect and brainstorm on how each might be able to be expressed typographically. Conceptualize. Consider: how does this audio feel? pacing? Go into as much description as you can. Keep any notes/sketches for your process work.
Due Next Tuesday 2nd